Promotional Banner and Product Recommendation Unit
Eshopbox allows you to add promotional banners and product recommendations to your tracking page. These elements help you turn a standard order-tracking experience into a branded customer touchpoint while creating opportunities to promote offers and products.
You can use:
- Promotional banners to highlight upcoming sales, special offers, new launches, or other campaigns. You can also add a redirect link to direct customers to a specific page when they select the banner.
- Product recommendations to showcase relevant products on the tracking page. This can help you create cross-sell and upsell opportunities while customers track their orders.
This article explains how to configure promotional banners and product recommendations in Eshopbox.
Add a promotional banner
To add a promotional banner to your tracking page:
Step 1: Log in to Eshopbox Workspace.
Step 2: Navigate to Settings > Customer Portal > Add Promotional Banner.
Step 3: In Add Promotional Banner, upload the banner image.
Recommended image size: 1920 × 400 px
Step 4: Enter the redirect link. When customers tap the banner, they're redirected to this link.
Step 5: Select where you want the banner to appear on the tracking page: Top of the page or Bottom of the page
Step 6: Click on Save.
You can preview your changes on the right side of the page. Select Desktop to view the full-page preview
Add product recommendations
You can add product recommendations to your tracking page either manually or by fetching product information from Shopify.
To configure product recommendations:
Step 1: Log in to Eshopbox Workspace.
Step 2: Navigate to Settings > Customer Portal > Add Product Recommendation
Step 3: In Add Product Recommendation, select the carousel heading that you want to display.
Step 4: Choose how you want to add products:
- Add product manually
- Fetch from Shopify
Add product manually
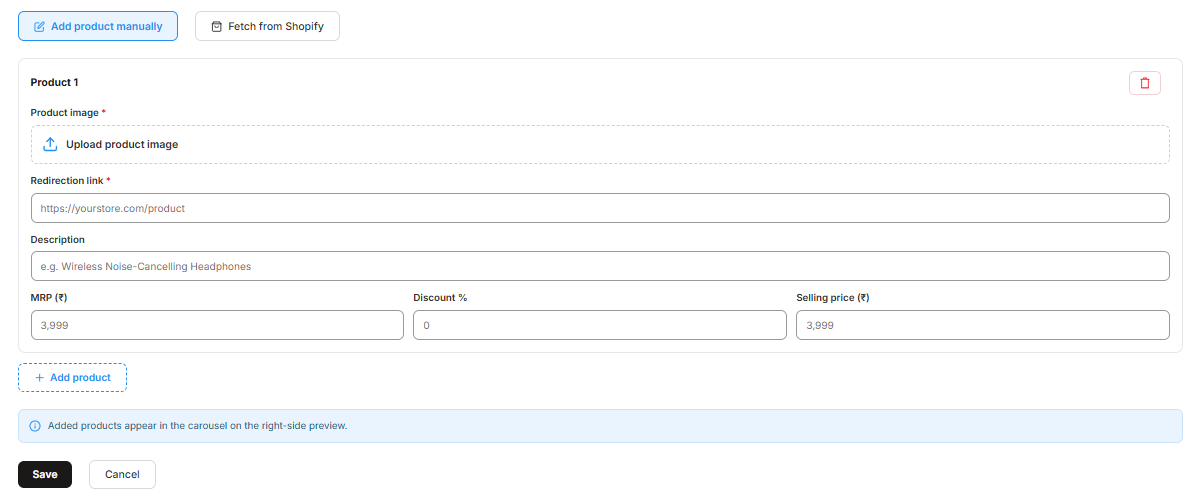
Step 1: Upload the product image.
Step 2: Enter the redirect link. When customers select the product image, they're redirected to this link
Step 3: Enter a product description.
Step 4: Enter the MRP and discount.
Step 5: Click on Save.
To recommend more products, select Add product and repeat these steps for each product.
To delete a product, click the Delete icon in the top-right corner.
Fetch a product from Shopify
If your product information is available in Shopify, you can fetch it using the product SKU instead of entering the details manually.
Step 1: Enter the Shopify SKU.
Step 2: Click on Fetch
Step 3: Review the fetched product.
Step 4: Click on Save
To delete a product, click the Delete icon.
Added products appear in the carousel on the right-side preview.
FAQs
Why is my product showing as invalid even though the SKU is correct?
If the SKU is correct but the product is still showing as Invalid, check the following:
- Check whether multiple Shopify stores are connected
- If two Shopify stores are connected to Eshopbox, the SKU will be considered from the newest connected Shopify store.
- Check the SKU in the newest Shopify store and ensure that it matches the SKU configured in Eshopbox.
- Recheck the SKU
- Verify that the SKU in Shopify exactly matches the SKU in Eshopbox.
- Check for differences such as extra spaces, special characters, or incorrect letters/numbers.